This blog ticket aims at demonstrating some of the most modern techniques in the world of the REST API, as follows :
- Using JAX-RS 2.0 to develop REST APIs. The JAX-RS 2.0 implementation used here is RESTeasy 3.0.19 provided by the Wildfly 10.1.0 application server. Wildfly is the community release of the famous JBoss, one of the most known and used Java EE application servers, currently provided by RedHat under the name of JBoss EAP (Enterprise Application Platform). In its 10.1.0 release, Wildfly supports the Java EE 7 specifications level.
- Using the Keycloak IAM (Identity and Access Management) server in order to secure our REST API. Keycloak is the community release of the RedHat Single Sign-On product. It encompasses lots of technology stacks like OAuth 2.0, OpenId Connect, SAML, Kerberos and much others. Here we’ll be using the last release of Keycloak server which is the 3.4.2.
- Using Docker containers to deploy the full solution.
So, let’s start coding.
The Customer Management REST API
For the purposes of our demo, we choose a quite classical business case : a customer management service. This service is exposing a REST API which may be called in order to perform CRUD operations with customers, like create, select, update and remove, as well as different multi-criteria find operations. In order to facilitate the speech clarity, a full maven project was provided in GitHub. Please follow this link in order to download and use it by browsing, building and testing it.
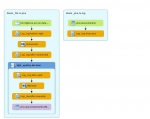
The project is structured on several layers, as follows :
- The customer-management project. This is a multi-module maven project hosting the master POM.
- The customer-management-data module. This module is the JPA (Java Persistence API) layer of the project and defines the entities required by the CRUD operations. In order to simplify things, only such entity is defined : Customer.
- The customer-management-repository module. The project is based on the « repository » design pattern. According to this design pattern, the data persistence and the data retriveral operations are abstracted such that to be performed through a series of straightforward methods, without the need to deal with database concerns like connections, commands, cursors, or readers. Using this pattern can help achieve loose coupling and can keep domain objects persistence ignorant. Here we use the implementation by Apache Deltaspike Data module of the « repository » pattern.
- The customer-management-facade module. This module implements the « facade » design pattern in order to provide an access data layer to the enterprise data. This layer consists in a stateless session bean which exposes a set of services above the repository layer.
- The customer-management-rest module. This module is the REST API and defines a set of JAX-RS (RESTeasy) services above the facade layer.
- The customer-management-ear module. This is a maven module which unique role is to package the whole stuff as an EAR archive. It also uses the wildfly maven plugin in order to deploy and undeploy the built EAR.
Now, let’s look in a more detailed manner at all these modules.
The customer-management-data artifact.
This maven artifact is a JAR archive containing the domain objects. In our case, there is only one domain object, the Customer class. Here is the listing :
package fr.simplex_software.customer_management.data;
...
@XmlRootElement(name="customer")
@XmlAccessorType(XmlAccessType.PROPERTY)
@Entity
@Table(name="CUSTOMERS")
public class Customer implements Serializable
{
private static final long serialVersionUID = 1L;
private BigInteger id;
private String firstName;
private String lastName;
private String street;
private String city;
private String state;
private String zip;
private String country;
public Customer()
{
}
public Customer(String firstName, String lastName, String street,
String city, String state, String zip, String country)
{
this.firstName = firstName;
this.lastName = lastName;
this.street = street;
this.city = city;
this.state = state;
this.zip = zip;
this.country = country;
}
public Customer (Customer customer)
{
this (customer.firstName, customer.lastName, customer.street,
customer.city, customer.state, customer.zip, customer.country);
}
@Id
@SequenceGenerator(name = "CUSTOMERS_ID_GENERATOR", sequenceName = "CUSTOMERS_SEQ")
@GeneratedValue(strategy = GenerationType.SEQUENCE,
generator = "CUSTOMERS_ID_GENERATOR")
@Column(name = "CUSTOMER_ID", unique = true, nullable = false, length = 8)
public BigInteger getId()
{
return id;
}
public void setId(BigInteger id)
{
this.id = id;
}
@XmlElement
@Column(name = "FIRST_NAME", nullable = false, length = 40)
public String getFirstName()
{
return firstName;
}
public void setFirstName(String firstName)
{
this.firstName = firstName;
}
...
The class Customer above uses JPA and JAXB annotations in order to define the domain object, together with the persistence and XML/JSON marshalling options. Besides the most notable things here there is the ID generation strategy which assumes the use of Oracle sequences. A generator named CUSTOMERS_ID_GENERATOR is defined and it creates an Oracle sequence named CUSTOMERS_SEQ used further to generate IDs each time a new customer has to be created. While this works fine with Oracle databases, it also works in the case of H2 in-memory databases, used for testing purposes, as in our case.
In addition to the JPA annotations, defining the database name and columns, the JAXB annotations aim at marshalling/unmarshalling the Java entities from/into XML/JSON payloads. This conversions are required upon invocation of the REST API, as we’ll see later.
The customer-management-repository artifact.
This artifact is the repository layer. It consists in the following interface :
package fr.simplex_software.customer_management.repository;
...
@Repository
public interface CustomerManagementRepository
extends EntityRepository<Customer, BigInteger>, EntityManagerDelegate<Customer>
{
public List<Customer> findByLastName (String lastName);
public List<Customer> findByCountry (String country);
public List<Customer> findByCity (String city);
public List<Customer> findByZip (String zip);
public List<Customer> findByState (String state);
public List<Customer> findByStreet (String street);
public List<Customer> findByFirstName(String firstName);
}
The interface above extends the Apache Deltaspike EntityRepository generic interface passing to it the domain class Customer as well as the ID class which is BigInteger. The idea here is to provide an EntityRepository for Customer domain objects, identified by BigInteger instances. That’s all. We don’t need to implement anything here, as all the required CRUD methods, like save(), refresh(), flush(), find(), remove(), etc. are already provided out-of-the-box. We just need to declare some customized finders with criteria, using the « findBy… » naming convention, and all these methods will be dynamically generated by the Apache Deltaspike Data module, at the deployment time. Awesome !
The repository design pattern is a very strong one made quite popular by its initial Spring Data implementation. Our demo being a Java EE 7 one, we don’t have any reason to use Spring here, hence Apache Deltaspike Data module is a very convenient alternative. It fits much better for business cases using Java EE 7 containers, like Wildfly 10, especially when it comes to the CMT (Container Managed Transactions), while Spring, as a non compliant Java EE framework, needs to integrate with an external transaction manager, with all the additional work and risks that this might involve.
The customer-management-facade artifact.
This artifact is the « facade » layer. It consists in the following stateless session bean with no interface :
package fr.simplex_software.customer_management.facade;
...
@Stateless
public class CustomerManagementFacade
{
private static Logger slf4jLogger =
LoggerFactory.getLogger(CustomerManagementFacade.class);
@Inject
private CustomerManagementRepository repo;
@Produces
@PersistenceContext
private static EntityManager entityManager;
public List<Customer> findByFirstName(String firstName)
{
return repo.findByFirstName(firstName);
}
public List<Customer> findByLastName(String lastName)
{
return repo.findByLastName(lastName);
}
public List<Customer> findByCountry(String country)
{
return repo.findByCountry(country);
}
public List<Customer> findByCity(String city)
{
return repo.findByCity(city);
}
public List<Customer> findByZip(String zip)
{
return null;
}
public List<Customer> findByState(String state)
{
return repo.findByState(state);
}
public List<Customer> findByStreet(String street)
{
return repo.findByStreet(street);
}
public List<Customer> findAll()
{
return repo.findAll();
}
public List<Customer> findAll(int customer, int arg1)
{
return repo.findAll(customer, arg1);
}
public Customer findBy(BigInteger customerId)
{
return repo.findBy(customerId);
}
………
As we can see in the listing above, the implementation is really very simple. The class CustomerManagementFacade uses the business delegate design pattern in order to expose the our data repository. The CustomerManagerRepository is injected here and used as a business delegate to provide the desired functionality. Everything is highly simplified by using the EJB container CMT, which automatically sets the boundaries of the transactions, such that to discharge the developer of the responsibility to manually handle the commit/rollback mechanics, very complex in a distribuetd environment. Here we are using the implicit attribute for enterprise bean, whic is TransactionAttributeType.REQUIRED. Based on this attribute, if the calling client is running within a transaction and invokes the enterprise bean’s method, the method executes within the client’s transaction. If the client is not associated with a transaction, the container starts a new transaction before running the method. The Java EE platform standard EntityManager is injected as well such that to take advanatge of the CMT. This is as opposed to the use of Spring or other Java SE techniques, which require to integrate with an external JPA implemntation, with all the additional work and risks that this might involve.
The customer-management-rest artifact
This artifact is the actual REST layer. Exactly the same way that the customer-management-facade was using the business delegate design pattern to expose its functionality above the repository layer, this layer uses the same business delegate design pattern to expose behaviour above the facade layer. Here is the code :
package fr.simplex_software.rest;
…
@Path("/customers")
@Produces(MediaType.APPLICATION_JSON)
@Consumes(MediaType.APPLICATION_JSON)
public class CustomerManagementResource
{
@EJB
private CustomerManagementFacade facade;
@POST
public Response createCustomer(Customer customer)
{
Customer newCustomer = facade.saveAndFlushAndRefresh(customer);
return Response.created(URI.create("/customers/" + newCustomer.getId())).entity(newCustomer).build();
}
@GET
@Path("{id}")
public Response getCustomer(@PathParam("id") BigInteger id)
{
return Response.ok().entity(facade.findBy(id)).build();
}
@PUT
@Path("{id}")
public Response updateCustomer(@PathParam("id") BigInteger id, Customer customer)
{
Customer cust = facade.findBy(id);
if (cust == null)
throw new WebApplicationException(Response.Status.NOT_FOUND);
Customer newCustomer = new Customer(cust);
customer.setId(cust.getId());
facade.save(newCustomer);
return Response.ok().build();
}
@DELETE
@Path("{id}")
public Response deleteCustomer(@PathParam("id") BigInteger id)
{
facade.removeAndFlush(id);
return Response.ok().build();
}
@GET
@Path("firstName/{firstName}")
public Response getCustomersByFirstName(@PathParam("firstName") String firstName)
{
return Response.ok().entity(facade.findByFirstName(firstName)).build();
}
@GET
public Response getCustomers()
{
return Response.ok().entity(facade.findAll()).build();
}
}
The listing above provide a customer CRUD implemented as a REST API. It exposes GET requests to select customers or to find them based on criteria like their first name or their ID, POST requests to create new customers, PUT requests to update existing customers, DELETE requests to remove customers, etc. All this by delegating to the facade layer. Another way to implement things would have been to directly annotate this class with the @Stateless annotation, in which case our REST layer would have been the facade layer in the same time. We preferd to decouple the facade layer from the REST layer, this having also the advantage to expose two different interfaces, dedicated to different kind of clients : HTTP clients invoking the REST layer and RMI/IIOP clients invoking directly the facade layer. Notice that using CDI to directly inject the repository layer would also have been an interesting possibility, giving a third type of interface to our API.
Now, the interesting part is the security configuration of the REST API layer. It is deployed as a WAR and, hence, this is done in the web.xml file below :
<?xml version="1.0" encoding="UTF-8"?>
<web-app version="3.1" xmlns="http://xmlns.jcp.org/xml/ns/javaee"
xmlns:xsi="http://www.w3.org/2001/XMLSchema-instance"
xsi:schemaLocation="http://xmlns.jcp.org/xml/ns/javaee http://xmlns.jcp.org/xml/ns/javaee/web-app_3_1.xsd">
<module-name>customer-management-rest</module-name>
<security-constraint>
<web-resource-collection>
<web-resource-name>customers</web-resource-name>
<url-pattern>/services/*</url-pattern>
</web-resource-collection>
<auth-constraint>
<role-name>customer-manager</role-name>
</auth-constraint>
</security-constraint>
<login-config>
<auth-method>KEYCLOAK</auth-method>
</login-config>
<security-role>
<role-name>customer-manager</role-name>
</security-role>
</web-app>
What the XML file above is saying is that our REST resources, which path is /services, are protected for all the HTTP requests (GET, POST, PUT, DELETE) such that only the customer-manager role be able to invoke the associated endpoints. This role has to be defined using the KEYCLOAK security provider
The customer-management-ear artifact
This artifact aims at building an EAR archive containing all the previous artifact and deploying it on the Wildfly platform. It is also responsible of the creation of the docker containers running the Wildfly and the Keycloak servers, as well as of their configuration. Everything is driven by docker-compose, a very convenient utility to handle and orchestrate docker containers. Here we are using the docker-compose plugin for maven and here is the associated YAML file :
version: "2"
services:
wfy10:
image: jboss/wildfly:10.1.0.Final
volumes:
- ./wfy10/customization:/opt/jboss/wildfly/customization/
container_name: wfy10
entrypoint: /opt/jboss/wildfly/bin/standalone.sh -b 0.0.0.0 -bmanagement 0.0.0.0
ports:
- 8080:8080
- 9990:9990
depends_on:
- "keycloak"
keycloak:
image: jboss/keycloak:latest
volumes:
- ./keycloak/customization:/opt/jboss/keycloak/customization/
container_name: keycloak
entrypoint: /opt/jboss/docker-entrypoint.sh -b 0.0.0.0 -bmanagement 0.0.0.0
ports:
- 18080:8080
- 19990:9990
environment:
KEYCLOAK_USER: admin
KEYCLOAK_PASSWORD: admin
The YAML file above is using docker-compse release 2. It defines two docker containers :
- One named keycloak, based on the image named jboss/keycloak:latest from the DockerHub registry. It will run the Keycloak 3.4.2 server by exposing the local TCP ports 8080 and 9990 as global host’s ports 18080 and 19990. A read-only volume will e created for this container and mapped to its /opt/jboss/keycloak/customization It contains some configuration scripts. Also, the user named admin, with password admin, will be created for this server.
- A second container named wfy10, based on the docker image named jboss/wildfly:10.1.0.Final from the DockerHub registry. This container depends on the first one. This dependency means that the authentication and authorization process, for components deployed on the Wildfly server, are performed by the Keycloak server. It exposes the local ports 8080 and 9990 as being the same global hosts ports.
Now, running the maven POM with this plugin :
<plugin>
<groupId>com.dkanejs.maven.plugins</groupId>
<artifactId>docker-compose-maven-plugin</artifactId>
<executions>
<execution>
<id>up</id>
<phase>install</phase>
<goals>
<goal>up</goal>
</goals>
<configuration>
<composeFile>
${project.basedir}/src/main/docker/docker-compose.yml
</composeFile>
<detachedMode>true</detachedMode>
</configuration>
</execution>
……….
Will check-out the two images from DockerHub and will create the two containers. The execution might take sometime, depending on the network latency.
mkdir tests
cd tests
git clone https://github.com/nicolasduminil/customer-management.git
…
cd customer-management
mvn –DskipTests clean install
…
We assume here that maven is installed and correctly configured with the required repositories. Also docker and docker-compose should be installed. Once the build process finishes, you can check the result as follows :
nicolas@BEL20:~/workspace/customer-management$ docker ps
CONTAINER ID IMAGE COMMAND CREATED STATUS PORTS NAMES
fa25d88b75f3 jboss/wildfly:10.1.0.Final "/opt/jboss/wildfly/…" 5 seconds ago Up 4 seconds 0.0.0.0:8080->8080/tcp, 0.0.0.0:9990->9990/tcp wfy10
05f1ad1377f9 jboss/keycloak:latest "/opt/jboss/docker-e…" 6 seconds ago Up 4 seconds 0.0.0.0:18080->8080/tcp, 0.0.0.0:19990->9990/tcp keycloak
Here we can see that we have two running containers, named respectivelly keycloak and wfy10. Now we need to configure the servers ran by these two containers such that we can use them for our purposes. The following script we’ll do :
docker exec -ti keycloak keycloak/customization/customize.sh > /dev/null
docker exec -ti wfy10 wildfly/customization/customize.sh > /dev/null
docker restart wfy10 > /dev/null
docker exec -ti wfy10 wildfly/customization/deploy.sh > /dev/null
The first line of this script is customizing the the keycloak server by running the customize.sh script. Here is the code :
#!/bin/bash
WILDFLY_HOME=/opt/jboss/keycloak
KCADM=$WILDFLY_HOME/bin/kcadm.sh
$KCADM config credentials --server http://localhost:8080/auth --realm master --user admin --password admin
$KCADM create users -r master -s username=customer-admin -s enabled=true
$KCADM set-password -r master --username customer-admin --new-password admin
$KCADM create clients -r master -s clientId=customer-manager-client
-s bearerOnly="true" -s "redirectUris=["http://localhost:8080/customer-management/*"]" -s enabled=true
$KCADM create clients -r master -s clientId=curl -s publicClient="true"
-s directAccessGrantsEnabled="true" -s "redirectUris=["http://localhost"]" -s enabled=true
$KCADM create roles -r master -s name=customer-manager
$KCADM add-roles --uusername customer-admin --rolename customer-manager -r master
The Keycloak server consists in a set of security realms. Each realm is a set of users, roles and clients. In order to secure our REST API we need to create a security realm containing the required users and roles as defined by the web.xml that we showed previously. This might be done in two ways :
- Using the Keycloak web aministrative console. This is probably the most general and the easiest method but it requires to interact with the console.
- Using the Keycloak server admin utility, named kcadm. This is a shell script allowing to perform in a programatic way every thing one could do with the admin console. This is the method we are using here as it complies very well with docker and docker-compose.
First we need to login to the Keycloak server. This is done by the config credentials command. Once logged-in, a JSON file is created and it will be used for the duration of the whole session. Then we create an user named customer-admin. The –r option indicates the name of the security realm. Keycloak comes with a seurity realm by default, called master. We could create a new security realm but we decided to use the existent one, for simplicity sake. This new user needs a password as well and this is created using the set-password command.
The Keycloak server uses the notion of client, defined as an entity that can request authentication on the behalf of a user. Clients support either the OpenID Connect protocol or SAML. Here we’ll be using OpenID Connect. There are two types of clients :
- Bearer-only clients. This is a term specific to the OAuth 2.0 protocol. The short explanation is that, in order to access securized services, a client needs an OAuth 2.0 Access Token. This token is created by the OAuth 2.0 implementation. Keycloak is an OAuth 2.0 implementation and, as such, it is able to create and provide to clients an access token such that they be able to invoke the given services. In order to get an access token, a client needs a bearer token, also called refresh token. So a bearer-only client is a Keycloak client that will only verify bearer tokens and can’t obtain the access tokens itself. This means that the caller, which is a service and not an user, is not going to be redirected to a login page, such that it would be the case of an web application. This is exactly what we need in a case where a service needs authentication and authorization in order to call another service.
- Public clients. This category of clients are able to obtain an access token based on a certain form of authetication.
In our case, we need two clients : a bearer-only client that will be used for the caller service authentication and authorization purposes, and a public client of the behalf of which we will manually get an access token by providing an username and a password. This is what happens in the script above, the two create clients commands. The first command is creating a bearer-only client, named customer-manager-client. This is the client that will be used by the caller. The second service, named curl, is a public one. It enables the Direct Grant Access (another OAuth 2.0 specific term) meaning that it is able to swap a username and a password for a token.
The last two lines of the script create the role customer-manager, specified by the security configuration in the web.xml file. Once created, this role is assigned to the user customer-admin on the behalf of the add-roles command.
The way that the Keycloak documentation recommends to use these two clients, is as follows :
RESULT=`curl --data "grant_type=password&client_id=curl&username=customer-admin&password=admin"
http://localhost:18080/auth/realms/master/protocol/openid-connect/token`
TOKEN=`echo $RESULT | sed 's/.*access_token":"//g' | sed 's/".*//g'`
This example would work on Linux as it relies on the utilization of the curl and sed utilities. Basically what happens here is that the first command, the curl request, invokes the Keycloak OpenID Connect token endpoint with grant type set to password. This triggers another OAuth 2.0 specific thing called Resource Owner Credentials Flow that allows to obtain an access token based on the provided credentials. This request assumes that the Keycloak OpenId Connect endpoint is accessible via the port 18080 of the localhost. Next, the access token is extracted from the curl result by the sed command. Now, this access token may be used by the caller service in order to authenticate against the called service. Now our Keycloak server, ran by the docker container with the same name, is configured and ready to be used. We need to configure the Wildfly server such that to take advantage of the Keycloak authentication/authorization and to deploy to it our EAR. This happens in the next lines of the setup.sh above. First, the wildfly/customization/customize.sh script is called in order to customize the Wildfly server. Here is the code :
#!/bin/bash
WILDFLY_HOME=/opt/jboss/wildfly
JBOSS_CLI=$WILDFLY_HOME/bin/jboss-cli.sh
$WILDFLY_HOME/bin/add-user.sh admin admin
if [ ! -f ./keycloak-wildfly-adapter-dist-3.4.2.Final.tar.gz ]
then
curl -O -s https://downloads.jboss.org/keycloak/3.4.2.Final/adapters/keycloak-oidc/keycloak-wildfly-adapter-dist-3.4.2.Final.tar.gz
fi
tar xzf keycloak-wildfly-adapter-dist-3.4.2.Final.tar.gz -C $WILDFLY_HOME
$JBOSS_CLI --file=$WILDFLY_HOME/bin/adapter-install-offline.cli
In order to configure Wildfly application server for Keycloak authentication, we need to download and install the keycloak adapter for Wildfly. This is what this script is doing. Once downloaded, the archive is stored in the Wildfly home directory and then the adapter-install-offline.cli is called. We only need to restart the Wildfly server such that to take advantage of the new configuration and, after that, on the behalf of the CLI, to deploy our EAR archive.
Testing our REST API
Now, once that our two docker containers are running and that our two servers are configured, we are ready for testing. The only last point to check is the file customer-management/customer-management-rest/src/main/webapp/WEB-INF/keycloak.json
{
"realm": "master",
"bearer-only": true,
"auth-server-url": "http://172.18.0.2:8080/auth",
"ssl-required": "external",
"resource": "customer-manager-client",
"confidential-port": 0,
"enable-cors": true
}
We need to make sure that the IP address in the 3rd line is the public IP address of the docker container running the Keycloak server (the one we called keycloak). This is quite easy to check, for example, by doing the following command :
docker inspect --format '{{ .NetworkSettings.IPAddress }}' keycloak
Once that this point is checked, we are ready to star tour integration tests. We are using here the failsafe maven plugin. For example :
cd tests/customer-manager
mvn failsafe:integration-test
This will launch the integration test named CustomerServiceTestIT which listing is provided here below :
package fr.simplex_software.rest;
…
@FixMethodOrder(MethodSorters.NAME_ASCENDING)
public class CustomerServiceTestIT
{
private static Logger slf4jLogger = LoggerFactory.getLogger(CustomerServiceTestIT.class);
private static Client client;
private static WebTarget webTarget;
private static Customer customer = null;
private static String token;
@BeforeClass
public static void init() throws Exception
{
token = Keycloak.getInstance("http://172.18.0.2:8080/auth", "master", "customer-admin",
"admin", "curl").tokenManager().getAccessToken().getToken();
}
@Before
public void setUp() throws Exception
{
client = ClientBuilder.newClient();
webTarget = client.target("http://localhost:8080/customer-management/services/customers");
}
@After
public void tearDown() throws Exception
{
if (client != null)
{
client.close();
client = null;
}
webTarget = null;
}
@AfterClass
public static void destroy()
{
token = null;
}
@Test
public void test1() throws Exception
{
slf4jLogger.debug("*** Create a new Customer ***");
Customer newCustomer = new Customer("Nick", "DUMINIL", "26 Allée des Sapins", "Soisy sous Montmorency",
"None", "95230", "France");
Response response = webTarget.request().header(HttpHeaders.AUTHORIZATION, "Bearer " +
token).post(Entity.entity(newCustomer, "application/json"));
assertEquals(201, response.getStatus());
customer = response.readEntity(Customer.class);
assertNotNull(customer);
String location = response.getLocation().toString();
slf4jLogger.debug("*** Location: " + location + " ***");
response.close();
}
@Test
public void test2()
{
String customerId = customer.getId().toString();
slf4jLogger.debug("*** Get a Customer with ID {} ***", customerId);
slf4jLogger.info("*** token: {}", token);
Response response = webTarget.path(customerId).request().header(HttpHeaders.AUTHORIZATION,
"Bearer " + token).get();
assertEquals(200, response.getStatus());
customer = response.readEntity(Customer.class);
assertNotNull(customer);
assertEquals(customer.getCountry(), "France");
}
@Test
public void test3()
{
String firstName = customer.getFirstName();
slf4jLogger.debug("*** Get a Customer by first name {} ***", firstName);
Response response =
ebTarget.path("firstName").path(firstName).request().header(HttpHeaders.AUTHORIZATION,
"Bearer " + token).get();
assertEquals(200, response.getStatus());
List<Customer> customers = response.readEntity(new GenericType<List<Customer>>(){});
assertNotNull(customers);
assertTrue(customers.size() > 0);
customer = customers.get(0);
assertNotNull(customer);
assertEquals(customer.getCountry(), "France");
}
@Test
public void test4()
{
String customerId = customer.getId().toString();
slf4jLogger.debug("*** Update the customer with ID {} ***", customerId);
customer.setCountry("Belgium");
Response response = webTarget.path(customerId).request().header(HttpHeaders.AUTHORIZATION,
"Bearer " + token).put(Entity.entity(customer, "application/json"));
assertEquals(200, response.getStatus());
}
@Test
public void test5()
{
String customerId = customer.getId().toString();
slf4jLogger.debug("*** Delete the customer with ID {} ***", customerId);
Response response = webTarget.path(customerId).request().header(HttpHeaders.AUTHORIZATION,
"Bearer " + token).delete();
assertEquals(200, response.getStatus());
}
@Test
public void test6()
{
Response response = webTarget.request().header(HttpHeaders.AUTHORIZATION, "Bearer " + token).get();
assertEquals(200, response.getStatus());
List<Customer> customers = response.readEntity(new GenericType<List<Customer>>(){});
assertNotNull(customers);
assertTrue(customers.size() > 0);
customer = customers.get(0);
assertNotNull(customer);
assertEquals(customer.getCountry(), "France");
}
}
As we can see, this is a simple test calling all the endpoint of our REST API. The only more notable thing is the way that we are getting the OAuth 2.0 access token. This happens in the init() method. It is annotated with the @BeforeClass annotation, meaning that it is executed only once, in the beggining, before the individual tests are done. The Java code we have here is the exact equivalent of the curl/sed commands combination presented above. The getInstance() methos gets an instance of the Keycloak server by providing the login information, as follows :
- The Keycloak OpenID Connect endpoint which is http://<ip-address>:<tcp-port>/auth, where <ip-address> is the keycloak docker container public IP addres (172.18.0.2 in our case), and <tcp-port> is the internal docker container tcp port where the Keycloak server is listening for requests (8080 in our case). These informtion should match the ones in the keycloak.json file, as mentioned previously. Please notice that, while the Keycloak server is accessible from the host running the docker container at the address localhost :18080, from inside the container, this address is 172.18.0.2 :8080.
- The name of the realm which, in our case, is master. This information should also match the one in keycloak .json.
- The credentials : username (customer-admin) and password (admin).
- The name of the Keycloak client having enabled the Direct Grant Acess of the OAuth 2.0 protocol. In our case we provided a client named curl. Please notice that there is no any realtion with the utility having the same name.
Once logged-in to the Keycloak server, we can get the TokenManager and, on its behalf, the AccessToken and, then the string representation of the access token itself. This string representation of the access token is stored in a static global property and injected as an AUTHORIZATION header with each HTTP request.
The listing below shows a fragment of the log file created by the test execution. You can see inside the Authorization: Bearer header. We replaced the token content by « … » in order to simplify things. At the end, you should see Tests run : 6, Failures : 0, Skipped : 0.
-------------------------------------------------------
T E S T S
-------------------------------------------------------
Running fr.simplex_software.rest.CustomerServiceIT
0 [main] DEBUG org.apache.http.impl.conn.PoolingClientConnectionManager - Connection request: [route: {}->http://172.18.0.2:8080][total kept alive: 0; route allocated: 0 of 10; total allocated: 0 of 10]
7 [main] DEBUG org.apache.http.impl.conn.PoolingClientConnectionManager - Connection leased: [id: 0][route: {}->http://172.18.0.2:8080][total kept alive: 0; route allocated: 1 of 10; total allocated: 1 of 10]
9 [main] DEBUG org.apache.http.impl.conn.DefaultClientConnectionOperator - Connecting to 172.18.0.2:8080
20 [main] DEBUG org.apache.http.client.protocol.RequestAddCookies - CookieSpec selected: best-match
24 [main] DEBUG org.apache.http.client.protocol.RequestAuthCache - Auth cache not set in the context
24 [main] DEBUG org.apache.http.client.protocol.RequestTargetAuthentication - Target auth state: UNCHALLENGED
24 [main] DEBUG org.apache.http.client.protocol.RequestProxyAuthentication - Proxy auth state: UNCHALLENGED
24 [main] DEBUG org.apache.http.impl.client.DefaultHttpClient - Attempt 1 to execute request
24 [main] DEBUG org.apache.http.impl.conn.DefaultClientConnection - Sending request: POST /auth/realms/master/protocol/openid-connect/token HTTP/1.1
25 [main] DEBUG org.apache.http.wire - >> "POST /auth/realms/master/protocol/openid-connect/token HTTP/1.1[r][n]"
26 [main] DEBUG org.apache.http.wire - >> "Accept: application/json[r][n]"
26 [main] DEBUG org.apache.http.wire - >> "Accept-Encoding: gzip, deflate[r][n]"
26 [main] DEBUG org.apache.http.wire - >> "Content-Type: application/x-www-form-urlencoded[r][n]"
26 [main] DEBUG org.apache.http.wire - >> "Content-Length: 73[r][n]"
26 [main] DEBUG org.apache.http.wire - >> "Host: 172.18.0.2:8080[r][n]"
26 [main] DEBUG org.apache.http.wire - >> "Connection: Keep-Alive[r][n]"
26 [main] DEBUG org.apache.http.wire - >> "[r][n]"
26 [main] DEBUG org.apache.http.headers - >> POST /auth/realms/master/protocol/openid-connect/token HTTP/1.1
26 [main] DEBUG org.apache.http.headers - >> Accept: application/json
26 [main] DEBUG org.apache.http.headers - >> Accept-Encoding: gzip, deflate
26 [main] DEBUG org.apache.http.headers - >> Content-Type: application/x-www-form-urlencoded
26 [main] DEBUG org.apache.http.headers - >> Content-Length: 73
26 [main] DEBUG org.apache.http.headers - >> Host: 172.18.0.2:8080
26 [main] DEBUG org.apache.http.headers - >> Connection: Keep-Alive
27 [main] DEBUG org.apache.http.wire - >> "grant_type=password&username=customer-admin&password=admin&client_id=curl"
131 [main] DEBUG org.apache.http.wire - << "HTTP/1.1 200 OK[r][n]"
132 [main] DEBUG org.apache.http.wire - << "Connection: keep-alive[r][n]"
132 [main] DEBUG org.apache.http.wire - << "Set-Cookie: KC_RESTART=; Version=1; Expires=Thu, 01-Jan-1970 00:00:10 GMT; Max-Age=0; Path=/auth/realms/master; HttpOnly[r][n]"
132 [main] DEBUG org.apache.http.wire - << "Content-Type: application/json[r][n]"
133 [main] DEBUG org.apache.http.wire - << "Content-Length: 2423[r][n]"
133 [main] DEBUG org.apache.http.wire - << "Date: Thu, 04 Jan 2018 11:06:44 GMT[r][n]"
133 [main] DEBUG org.apache.http.wire - << "[r][n]"
133 [main] DEBUG org.apache.http.impl.conn.DefaultClientConnection - Receiving response: HTTP/1.1 200 OK
133 [main] DEBUG org.apache.http.headers - << HTTP/1.1 200 OK
133 [main] DEBUG org.apache.http.headers - << Connection: keep-alive
134 [main] DEBUG org.apache.http.headers - << Set-Cookie: KC_RESTART=; Version=1; Expires=Thu, 01-Jan-1970 00:00:10 GMT; Max-Age=0; Path=/auth/realms/master; HttpOnly
134 [main] DEBUG org.apache.http.headers - << Content-Type: application/json
134 [main] DEBUG org.apache.http.headers - << Content-Length: 2423
134 [main] DEBUG org.apache.http.headers - << Date: Thu, 04 Jan 2018 11:06:44 GMT
153 [main] DEBUG org.apache.http.client.protocol.ResponseProcessCookies - Cookie accepted [KC_RESTART="", version:1, domain:172.18.0.2, path:/auth/realms/master, expiry:Thu Jan 01 01:00:10 CET 1970]
154 [main] DEBUG org.apache.http.impl.client.DefaultHttpClient - Connection can be kept alive indefinitely
264 [main] DEBUG org.apache.http.wire - << "{"access_token":"eyJhbGciOiJSUzI1NiIsInR5cCIgOiAiSldUIiwia2lkIiA6ICI1WW1JaW50R09uZ2J0RExCYzREeUJKQVlpRk5LdUNTS1VJRVYyaUNFekZZIn0.eyJqdGkiOiI2NGJiZTAyZS00Zjk4LTRlMGEtOGFiNy1iNzVkNTQzZTFmN2QiLCJleHAiOjE1MTUwNjQwNjQsIm5iZiI6MCwiaWF0IjoxNTE1MDY0MDA0LCJpc3MiOiJodHRwOi8vMTcyLjE4LjAuMjo4MDgwL2F1dGgvcmVhbG…..
308 [main] DEBUG org.apache.http.impl.conn.PoolingClientConnectionManager - Connection [id: 0][route: {}->http://172.18.0.2:8080] can be kept alive indefinitely
308 [main] DEBUG org.apache.http.impl.conn.PoolingClientConnectionManager - Connection released: [id: 0][route: {}->http://172.18.0.2:8080][total kept alive: 1; route allocated: 1 of 10; total allocated: 1 of 10]
316 [main] DEBUG fr.simplex_software.rest.CustomerServiceIT - *** Create a new Customer ***
335 [main] DEBUG org.apache.http.impl.conn.BasicClientConnectionManager - Get connection for route {}->http://localhost:8080
335 [main] DEBUG org.apache.http.impl.conn.DefaultClientConnectionOperator - Connecting to localhost:8080
336 [main] DEBUG org.apache.http.client.protocol.RequestAddCookies - CookieSpec selected: best-match
336 [main] DEBUG org.apache.http.client.protocol.RequestAuthCache - Auth cache not set in the context
336 [main] DEBUG org.apache.http.client.protocol.RequestProxyAuthentication - Proxy auth state: UNCHALLENGED
336 [main] DEBUG org.apache.http.impl.client.DefaultHttpClient - Attempt 1 to execute request
336 [main] DEBUG org.apache.http.impl.conn.DefaultClientConnection - Sending request: POST /customer-management/services/customers HTTP/1.1
336 [main] DEBUG org.apache.http.wire - >> "POST /customer-management/services/customers HTTP/1.1[r][n]"
336 [main] DEBUG org.apache.http.wire - >> "Accept-Encoding: gzip, deflate[r][n]"
337 [main] DEBUG org.apache.http.wire - >> "Authorization: Bearer eyJhbGciOiJSUzI1NiIsInR5cCIgOiAiSldUIiwia2lkIiA6ICI1WW1JaW50R09uZ2J0RExCYzREeUJKQVlpRk5LdUNTS1VJRVYyaUNFekZZIn0.eyJqdGkiOiI2NGJiZTAyZS00Zjk4LTRlMGEtOGFiNy1iNzVkNTQzZTFmN2QiLCJleHAiOjE1MTUwNjQwNjQsIm5iZiI6MCwiaWF0IjoxNTE1MDY0MDA0LCJpc3MiOiJodHRwOi8vMTcyLjE4LjAuMjo4MDgwL2F1dGgvcmVhbG1zL21hc3RlciIsImF1…
337 [main] DEBUG org.apache.http.wire - >> "Content-Type: application/json[r][n]"
337 [main] DEBUG org.apache.http.wire - >> "Content-Length: 163[r][n]"
337 [main] DEBUG org.apache.http.wire - >> "Host: localhost:8080[r][n]"
337 [main] DEBUG org.apache.http.wire - >> "Connection: Keep-Alive[r][n]"
337 [main] DEBUG org.apache.http.wire - >> "[r][n]"
337 [main] DEBUG org.apache.http.headers - >> POST /customer-management/services/customers HTTP/1.1
337 [main] DEBUG org.apache.http.headers - >> Accept-Encoding: gzip, deflate
337 [main] DEBUG org.apache.http.headers - >> Authorization: Bearer eyJhbGciOiJSUzI1NiIsInR5cCIgOiAiSldUIiwia2lkIiA6ICI1WW1JaW50R09uZ2J0RExCYzREeUJKQVlpRk5LdUNTS1VJRVYyaUNFekZZIn0.eyJqdGkiOiI2NGJiZTAyZS00Zjk4LTRlMGEtOGFiNy1iNzVkNTQzZTFmN2QiLCJleHAiOjE1MTUwNjQwNjQsIm5iZiI6MCwiaWF0IjoxNTE1MDY0MDA0LCJpc3MiOiJodHRwOi8vMTcyLjE4LjAuMjo4MDgwL2F1dGgvcmVhbG1zL21hc3RlciIsImF1…
337 [main] DEBUG org.apache.http.headers - >> Content-Type: application/json
337 [main] DEBUG org.apache.http.headers - >> Content-Length: 163
337 [main] DEBUG org.apache.http.headers - >> Host: localhost:8080
337 [main] DEBUG org.apache.http.headers - >> Connection: Keep-Alive
337 [main] DEBUG org.apache.http.wire - >> "{"id":null,"firstName":"Nick","lastName":"DUMINIL","street":"26 All[0xc3][0xa9]e des Sapins","city":"Soisy sous Montmorency","state":"None","zip":"95230","country":"France"}"
674 [main] DEBUG org.apache.http.wire - << "HTTP/1.1 201 Created[r][n]"
676 [main] DEBUG org.apache.http.wire - << "Expires: 0[r][n]"
676 [main] DEBUG org.apache.http.wire - << "Cache-Control: no-cache, no-store, must-revalidate[r][n]"
676 [main] DEBUG org.apache.http.wire - << "X-Powered-By: Undertow/1[r][n]"
676 [main] DEBUG org.apache.http.wire - << "Server: WildFly/10[r][n]"
676 [main] DEBUG org.apache.http.wire - << "Pragma: no-cache[r][n]"
676 [main] DEBUG org.apache.http.wire - << "Location: http://localhost:8080/customer-management/services/customers/1[r][n]"
676 [main] DEBUG org.apache.http.wire - << "Date: Thu, 04 Jan 2018 11:06:45 GMT[r][n]"
676 [main] DEBUG org.apache.http.wire - << "Connection: keep-alive[r][n]"
676 [main] DEBUG org.apache.http.wire - << "Content-Type: application/json[r][n]"
676 [main] DEBUG org.apache.http.wire - << "Content-Length: 160[r][n]"
676 [main] DEBUG org.apache.http.wire - << "[r][n]"
676 [main] DEBUG org.apache.http.impl.conn.DefaultClientConnection - Receiving response: HTTP/1.1 201 Created
676 [main] DEBUG org.apache.http.headers - << HTTP/1.1 201 Created
676 [main] DEBUG org.apache.http.headers - << Expires: 0
676 [main] DEBUG org.apache.http.headers - << Cache-Control: no-cache, no-store, must-revalidate
676 [main] DEBUG org.apache.http.headers - << X-Powered-By: Undertow/1
676 [main] DEBUG org.apache.http.headers - << Server: WildFly/10
676 [main] DEBUG org.apache.http.headers - << Pragma: no-cache
676 [main] DEBUG org.apache.http.headers - << Location: http://localhost:8080/customer-management/services/customers/1
676 [main] DEBUG org.apache.http.headers - << Date: Thu, 04 Jan 2018 11:06:45 GMT
676 [main] DEBUG org.apache.http.headers - << Connection: keep-alive
677 [main] DEBUG org.apache.http.headers - << Content-Type: application/json
677 [main] DEBUG org.apache.http.headers - << Content-Length: 160
679 [main] DEBUG org.apache.http.impl.client.DefaultHttpClient - Connection can be kept alive indefinitely
679 [main] DEBUG org.apache.http.wire - << "{"id":1,"firstName":"Nick","lastName":"DUMINIL","street":"26 All[0xc3][0xa9]e des Sapins","city":"Soisy sous Montmorency","state":"None","zip":"95230","country":"France"}"
684 [main] DEBUG org.apache.http.impl.conn.BasicClientConnectionManager - Releasing connection org.apache.http.impl.conn.ManagedClientConnectionImpl@3e27aa33
684 [main] DEBUG org.apache.http.impl.conn.BasicClientConnectionManager - Connection can be kept alive indefinitely
684 [main] DEBUG fr.simplex_software.rest.CustomerServiceIT - *** Location: http://localhost:8080/customer-management/services/customers/1 ***
…
Congratulations, you just have configured and run two docker containers, with Keycloak and Wildfly servers, and you tested the REST API authentication/authorization with Oauth 2.0 and OpenId Connect protocols.